Apply for a MATOD NAS Authority
You can apply for an authority to prescribe or supply morphine for infants to treat Neonatal Abstinence Syndrome quickly and easily in ScriptCheckSA.
-
From the navigation menu, select Authorities.
-
Select Apply for Authority > MATOD NAS.
After you select Apply for Authority > MATOD NAS, the Getting Started screen of the MATOD NAS authority application is displayed.
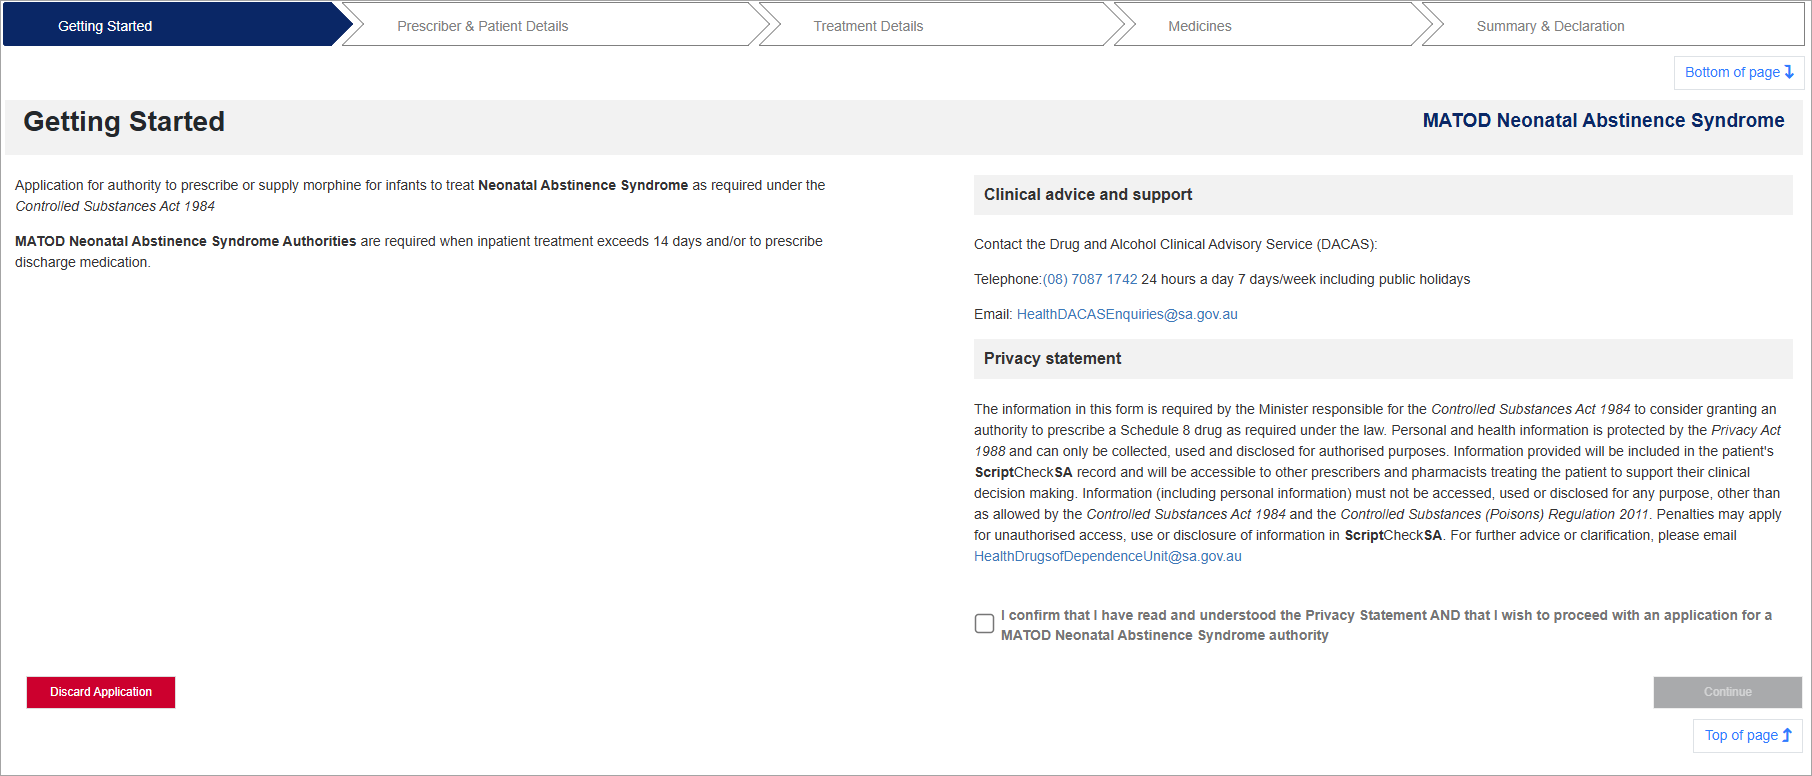
Read the information about the requirements for the authority, Clinical advice and support, and the Privacy statement.
When you have reviewed the information on this screen, select the checkbox to confirm you have read and understood it.
To move to the next screen, click Continue. Or, to abandon your application, click Discard Application.

On this screen you will review the prescriber details and add the patient.
Some fields are editable and some are read-only. Fields marked with an asterisk * are mandatory and must be completed before you can move to the next screen.
Prescriber details
-
Select your Practice address from the drop-down list.
-
If the practice address is not listed, select Other from the list, then enter Other practice address.
This address is checked by the DDU. It is also included in all correspondence generated from this authority.
Patient details
-
Under Patient Details, click the Add Patient button.
The Patient Search popup displays, enabling you to search for an existing patient or add a new patient.
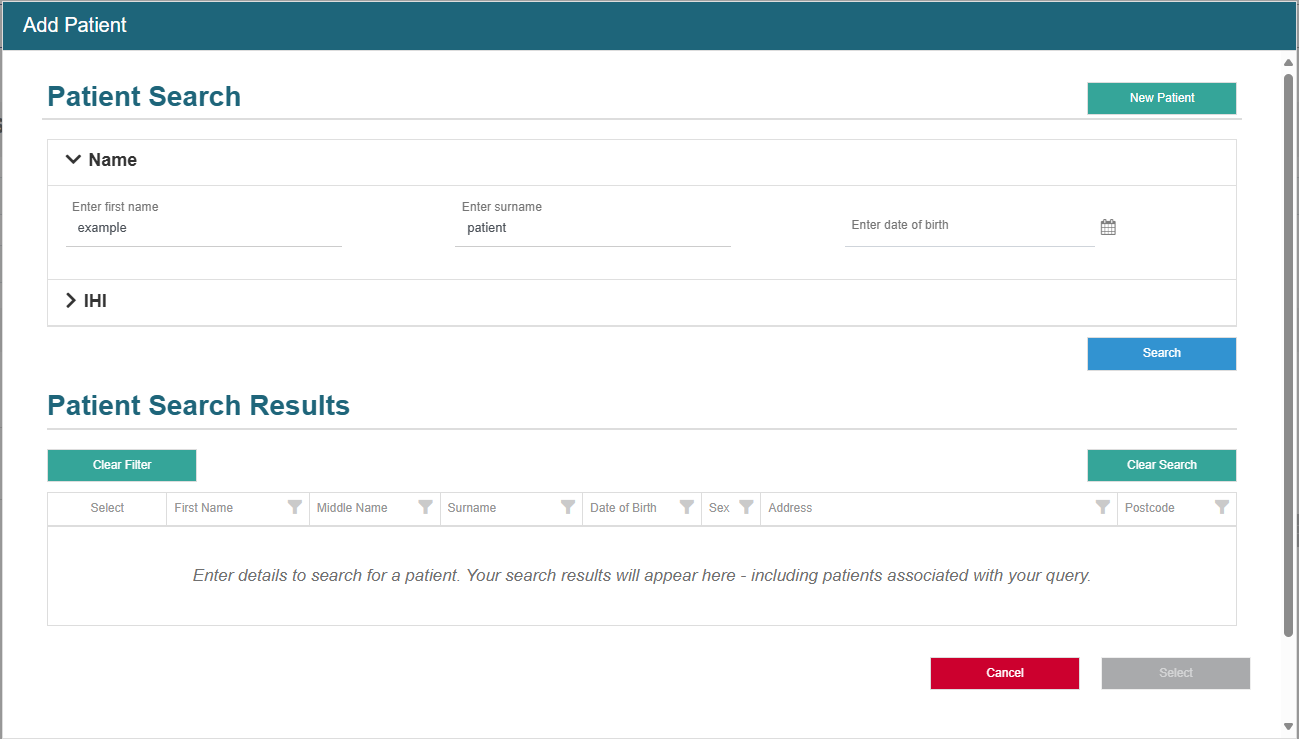
To search for a patient to link to this authority:
- Enter at least one character in First Name or Surname. Optionally, enter Date of Birth, or the patient's IHI Number, then select Search.
A list of matching patients displays in Patient Search Results.
-
From Patient Search Results, select the patient by marking the checkbox next to the relevant entry and click Select.
To add a new patient to the authority:
If you cannot locate the patient you want to add to this authority, create a new patient record, then link it to the authority.
-
From the Add Patient form, select New Patient.
-
First name (mandatory)
-
Last name (mandatory)
-
Date of birth (mandatory)
-
Sex (mandatory)
-
Address
-
Street type (optional)
-
Street number (optional)
-
Street name (mandatory)
-
Suburb (mandatory)
-
Postcode (mandatory)
-
State (mandatory)
-
-
your changes (If all required inputs are valid) to return to the authority page.
The patient details display on the authority page.
A temporary profile is created for this patient.
While this profile is temporary, it does not display in Search Results, and therefore cannot be linked to any other entity.
(Optional) You can add more details about the patient in the Additional Patient Information box.
Once the patient has been added, do one of the following (if required):
- View Patient - Open the profile in a new browser to view the full patient details and make any required changes. If you make changes, you need to click save, then return to the previous browser tab.
- Refresh Patient - If you have made changes to the patient details.
- Remove Patient - If your patient selection is incorrect.
If you need to make a change to the patient's details:
-
Click View Patient, which opens the patient profile in a new browser tab.
-
Make the change to the patient's details, then click Save.
-
Click on the previous browser tab (or close the tab with the patient profile) to go back to the authority application.
-
Click Refresh Patient, so that the changes you made are updated.
To move to the next screen, click Continue. Alternatively, you can click:
-
Save Changes to save your application as a draft, then Close to exit the application.
-
Discard Application to abandon your application and delete any saved draft.
The Continue button will only become available when you have completed all of the mandatory fields on this screen.

Fields marked with an asterisk * are mandatory and must be completed before you can move to the next screen.
Questionnaire - answer the question.
Treatment Details - Enter the start date of treatment/Date of first dose and the expected period of treatment in weeks. You can add additional remarks in the text box.
To move to the next screen, click Continue. Alternatively, you can click:
-
Save Changes to save your application as a draft, then Close to exit the application.
-
Discard Application to abandon your application and delete any saved draft.
The Continue button will only become available when you have completed all of the mandatory fields on this screen.
-
Select Search for medicine and enter at least three characters. You can search by brand name or generic name.
A list of medicines is displayed, sorted alphabetically by drug name.
If you can’t find a medicine, then you can fill in the details in the Enter the drug name, dose and directions … field.
-
Use the scroll bar to navigate through the list, then select the required entries.
The selected medicines display.
Generic names are added to the authority, even if you search for and select a medicine based on its brand name.
-
Fill in the directions for use for each of the medicines selected.
-
Select the trash icon next to a medicine to remove it.
Search results only display drugs that are relevant to this authority type.
To move to the next screen, click Continue. Alternatively, you can click:
-
Save Changes to save your application as a draft, then Close to exit the application.
-
Discard Application to abandon your application and delete any saved draft.
The Continue button will only become available when you have completed all of the mandatory fields on this screen.

The final step of the application is the Summary & Declaration screen. Review all details to ensure they are correct. If required, you can use the Back button in your browser or the tabs at the top of the application to go back and make any necessary corrections.
(Optional) Under Correspondence, you can upload a document to be included in your application. Click Upload document.
- Choose file - Select a single file to be uploaded. Max size is 4 MB.
Drop file here - Drag-and-drop a file to be uploaded.
Upload - The document is uploaded to ScriptCheckSA.
If the document's file type is not allowed, or if malware is detected, the upload is not permitted.
Cancel - The document is not uploaded.
When you are ready to submit your authority application:
-
Read the Declaration then, if you are able to make the declaration, select the checkboxes.
-
Click Submit.
The Application Submitted popup displays confirming that your application has been submitted.
If you want to refer to the application later on, you can view it in the My Authorities area of your dashboard. See View and Update Authorities for more details.